Have you ever admired a beautiful upholstered headboard and thought, “I wish I could make that myself”?
Good news—you can.
A DIY tufted headboard is one of the most satisfying upholstery projects you can take on. It adds softness, texture, and personality to a bedroom, and it’s a project many DIYers can complete in a weekend.
Even better, building a headboard teaches foundational upholstery techniques you can use on many other projects.
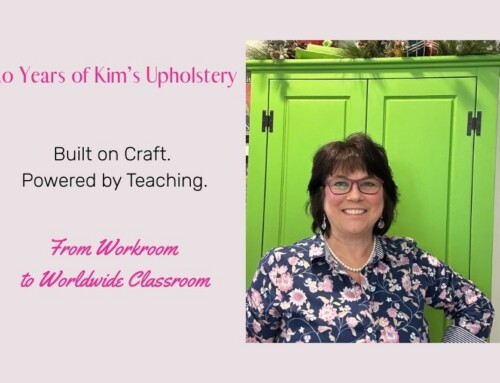
In this guide, I’ll walk you through the basic process of building a tufted headboard. And if you want to see every step up close, our Kim’s Upholstery Online Classes include full headboard tutorials showing exactly how to build and upholster one from start to finish.
👉 Explore the headboard tutorials here: HEADBOARDS

Why Make a DIY Upholstered Headboard?
A custom headboard instantly elevates a bedroom.
Instead of purchasing something mass-produced, you can create something unique that reflects your style.
When you build your own upholstered headboard, you can:
• Choose the perfect fabric for your space
• Customize the size for your bed
• Add tufting or decorative trim
• Learn upholstery skills you can use on future furniture projects
Many of the techniques used in a headboard project—padding, fabric application, and finishing edges—are the same skills used in professional upholstery.
That’s why I often tell beginners that a headboard is a wonderful introduction to upholstery
What Materials Are Needed for a Tufted Headboard?
One reason a DIY upholstered headboard is such a great beginner project is that the materials are fairly simple.
Most headboards require:
Structure
• Plywood or luan for the base
• Lumber for legs or mounting supports
• Wood screws or nails
• Wood glue
Padding
• Upholstery foam (usually 2″)
• Dacron batting
Upholstery Supplies
• Upholstery fabric (typically 3–8 yards depending on size)
• Staple gun and staples
• Buttons for tufting
• Upholstery twine
• Lining fabric for the back
• Decorative trim or welt cord (optional)
Choosing a fabric you love makes the finished piece even more special because it becomes the focal point of your bedroom.
How to Make a Tufted Headboard (Step-by-Step Overview)
The process of building a tufted headboard follows several key steps.
1. Build the Headboard Base
Start by cutting plywood to the shape and size of your headboard.
Some people prefer a simple rectangle while others create curves or decorative shapes. Legs or supports are attached so the headboard can be mounted to the bed or wall.

2. Add Foam and Padding
Once the frame is built, upholstery foam is applied to create depth and comfort.
A layer of Dacron batting is then added over the foam to soften the edges and help the fabric lay smoothly.

3. Create the Tufting Pattern
Tufting is what gives the headboard its classic upholstered look.
Buttons are pulled through the fabric, foam, and wood base to create deep dimples and a diamond pattern across the surface.
This is the step where many DIYers benefit from seeing the process demonstrated.

4. Add Decorative Details
Depending on the design, you might add finishing touches like:
• Welt cord around the edge
• Decorative trim
• Upholstered boxing
These small details make the headboard look professionally finished.

5. Finish the Back
Finally, the back of the headboard is covered with a lining fabric to conceal staples and create a clean finished appearance.

Is a DIY Tufted Headboard Beginner Friendly?
Yes—with the right guidance.
The biggest challenges DIYers typically face include:
• planning the tufting layout
• keeping the fabric smooth while tufting
• pulling buttons evenly
• finishing edges neatly
This is why many people find it much easier to follow step-by-step video instruction instead of written directions.
Watch the Full Headboard Tutorial Inside Our Upholstery Classes
Inside Kim’s Upholstery Online Classes, I walk members through the complete process of building and upholstering a tufted headboard.
The headboard course includes multiple lessons covering:
• Building the frame
• Padding with foam and Dacron
• Creating the tufting pattern
• Installing buttons
• Applying decorative trim
• Finishing the back
You’ll see every step up close so you can confidently build your own.
👉 Explore the headboard tutorials: HERE


A Headboard Is the Perfect Weekend Upholstery Project
If you’ve been wanting to learn upholstery but feel intimidated by larger furniture projects, a headboard is a great place to begin.
It’s large enough to practice real upholstery techniques, but manageable enough to complete in a weekend.
And when you’re finished, you’ll have something you made with your own hands that becomes the centerpiece of your bedroom.
That’s the magic of learning upholstery.
Learn Upholstery Step-By-Step
If you’d like guidance beyond this article, our Kim’s Upholstery Online Classes include hundreds of video lessons covering real projects.
Inside the membership, you’ll find tutorials for:
• chairs
• cushions
• headboards
• slipcovers
• lampshades
• and much more
Members also get access to our supportive upholstery community and weekly live chats.
👉 Learn more about joining: HERE
You might be surprised at what you can build once you understand the process, a diy tufted headboard is just the beginning!
DIY Tufted Headboard Ideas
Looking for inspiration for your own upholstered headboard?
Popular styles include:
• Diamond tufted headboards
• Channel tufted headboards
• Modern square tufting
• Nailhead trim headboards
• Curved upholstered headboards
Saving inspiration photos before starting your project can help you choose fabrics, tufting styles, and shapes that match your bedroom.