Wingback Settee
 Every wingback has it’s own little challenges. Over the years I have done 100’s of wing back chairs and each time I do one there is a new challenge or detail to consider. The shape of the wings vary, the height of the back changes, and on and on. This particular piece was a settee style wing back and it had decorative nail heads on the perimeter of the outside wings, outside arm and outside back.
The new detail for this piece was that the inside wing and arm were one piece of fabric, not the two pieces often seen on a wingback. Sounds simple due to one less step, but you must get the shape just right. So using the frame as a template I created the new piece of fabric which would be the inside arm and wing. The next 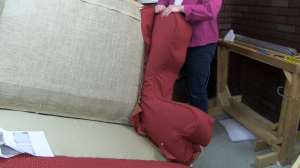 step was to sew a boxing strip around the perimeter and know just where to start stapling to make it all land just so! Once I got everything lined up the way I wanted the stapling went right along. The other challenge with this style is making the relief cuts to get the boxing nice and tight along the inside curve where the wing meets the arm with out cutting to deep…Yikes, talk about intimidation, especially if this was your first experience with this type of application.
Now on to the inside back which was a breeze after doing the previous steps. Padding your piece for comfort can sometimes be a challenge. How much is enough and when is it too much? I often times will pad a piece and sit in it just to get the feel before putting on the final fabric. Kinda like Goldie Locks and the three bears where I get to be Goldie Locks, what fun!
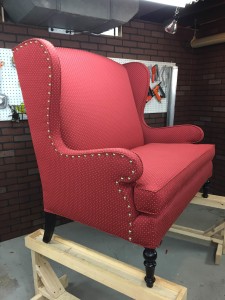
The outsides of this piece was done a little different than the way I usually do an outside. Again the outside arm and wing area were one piece of fabric. The outside curve of the wing back settee had beautiful decorative nails to enhance the 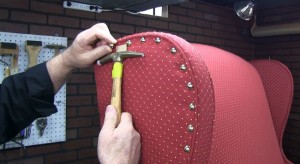 shape and draw your eye to make this detail a statement, this made using curve ease not the best choice. The nails I used were a 5/8″ domed bright brass purchased from DIY Upholstery Supply. They were D.A.D.s BS412. In order to have the nail heads sit nicely on the finished piece I hand stitched the outsides along the curve to enable my nail heads to sit just sew, oops, so!
To make things more difficult Bill was recording video of the project for our online membership site . While creating the video tutorials is fun and rewarding in that I get to help teach others and keep the upholstery craft alive, it does make the process of finishing a piece take a lot longer. Take a look at a few short clips of the video we made while upholstering this settee.
Learn To Upholster This Wingback Settee and build up your upholstery skills. I hope you’ll check out our new video content and don’t forget to come back and take a peak often as our video library is constantly growing. If your on Facebook please feel free to post ideas of videos that you would like to see or techniques that you want to learn on our Kim’s Upholstery FB page. By signing up to our mailing list below you will be notified when new content has been added to our UpholsteryClass membership site. .
Thanks for taking the time to check out my blog post,
Kim