Upholstery project photos are a great reference
Before you begin a reupholstery project it’s a good idea to take photos of the piece you will be working on. These photos will help you remember details of how the piece looked before you started. Were there decorative nails? What was the spacing? Were they on the arm panels or just on the bottom of the bottom rail. Cording? You get the picture.
Many of you have seen my videos and in several of them, I mention how important it is to take photos before you begin the teardown process. It dawned on me that I have never shared examples of the photos I take and why I take those particular photos. Let me give you a few examples of my upholstery project photos.
Taking pictures of your reupholstery project
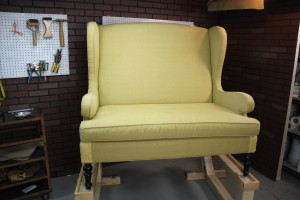 This is a Wingback Setee that was brought in to be reupholstered. This first photo is just an overall look at the settee from the front. From this picture I can see that there is cording on the cushion and cording on the inside and outside arms. The yellow patches on the corners of the deck are just that. Patches covering cat damage and not to be replaced.
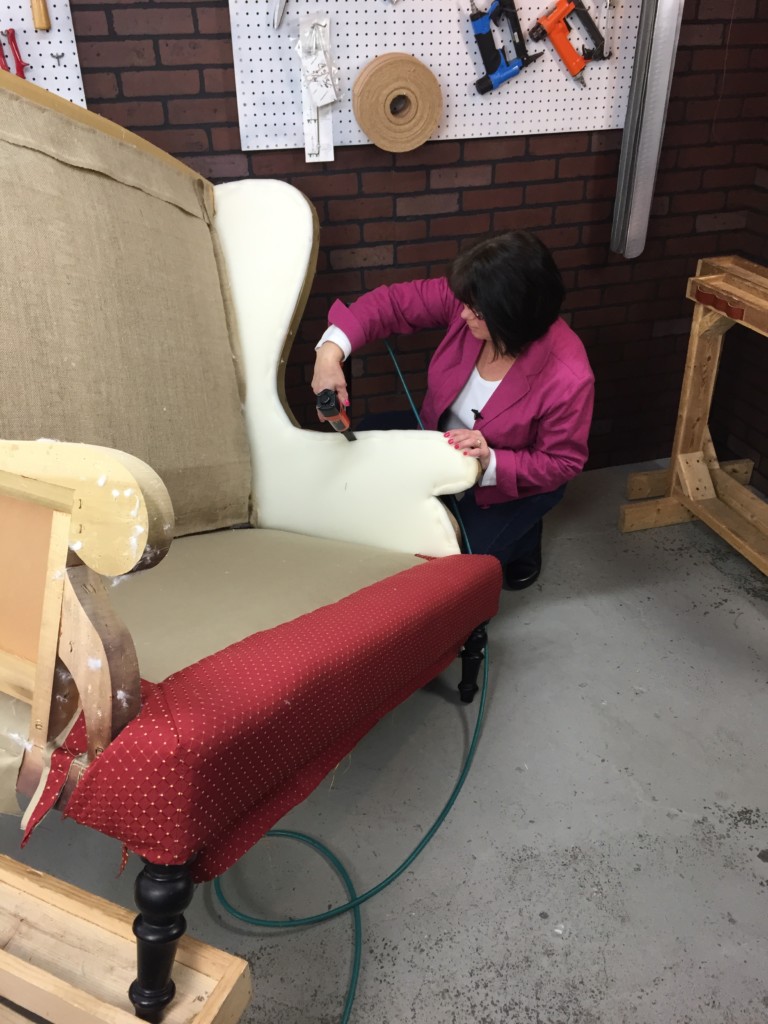
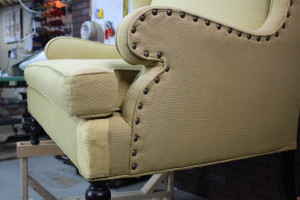 This next photo gives us a closer look at the detail of the outside arm. In this picture, you can see the cording going around the bottom of the chair and you also notice that the decorative nails stop at the bottom of the arm and do not continue around the bottom of the chair.
Remembering the details as you reupholster
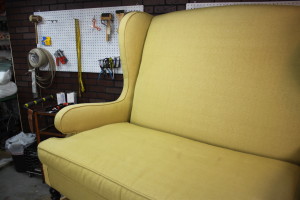 Our next photo shows that there are no seams on the inside arms, something that you might find on other wingback pieces where the arm and wing come together. You can also see that the top of the seat cushion lines up with the inside curve of the arm panel at the front of the settee. This detail is also evident in the previous photo.
The more pictures to refer to the better
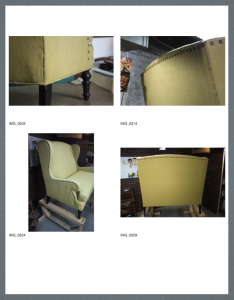 I usually take at least 8 photos of a project and upload them to iPhoto on my Mac. I label these photos as (Project-example-wingback) or (Project-example-club chair). The reason I label them all beginning with Project is so I can easily find them and they don’t get mixed up with personal or other website photos. Next, I print out a contact sheet for Kim, with 4 photos per page and she adds whatever notes she has to them. For example, the customer wants contrast cording in ____ fabric and decorative nails at bottom of the settee on front and two sides only.
They say a picture is worth 1000 words, Right
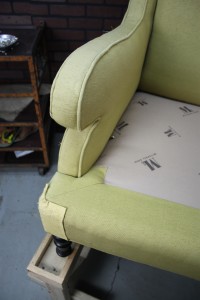
The last picture that I want to share is of the deck detail. You can see the deck is a T deck with mitered corners. Here you can see that the deck was constructed with two different fabrics, the decorative face fabric, and a twill decking fabric. Sometimes our clients will request ‘self-decking’ meaning they want only the decorative fabric used in the decking
You can find a video on how to construct a T-deck with mitered corners in our membership. Here Is a snippet of our T-Deck with Mitered Corners video. You can find this and many more in-depth learning video tutorials to help you get started reupholstering as part of your online membership.