 Slipcovers can be just what you are looking for, and now you can learn to make your own slipcover right from your home!
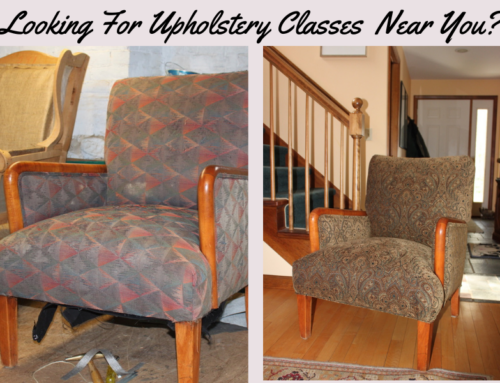
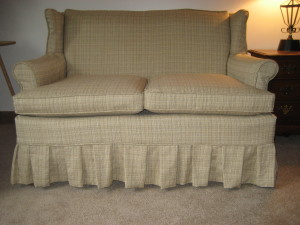
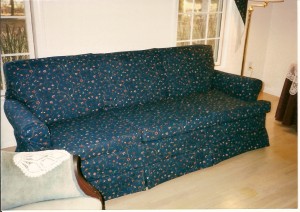
When we look through magazines, we all see ads for the “not-so-fitted” slipcovers. Your chair or sofa may still be in really good shape structurally… but the fabric…not so much. Years of comfort are now showing the signs of use. So, do you start over and buy a new piece, or do you give it a new life with some fresh fabric? Or maybe you just love the slipcover look you see in many magazines, featuring beautiful rooms that make you want to come in and sit awhile.
So is your piece of furniture appropriate for slipcovers?
Well let’s start with a little evaluation. Does it still feel comfortable to you? Is the piece all intact with no springs sagging out of the bottom? Do you still love the piece’s shape? If you answered yes to all of these questions, then YES, your piece is a candidate for a DIY slipcover.
Sewing slipcovers takes skill and patience, and is not a good beginner sewing project.
Now that we have established your furniture piece is a candidate, let us talk about the skills you would need to do this on your own. You really need more advanced sewing knowledge. Having mended a few items or hemmed a few pairs of pants probably isn’t enough. Sewing a slipcover takes skill and patience. Hopefully,y you have sewn many things from start to finish, such as clothing, quilts, cushions, and maybe even made your own window treatments. Obviously, if you sew soft home furnishings for a living, slipcovers are the next logical item to add to your client offerings.
Can I sew slipcovers with my sewing machine?
Great! Your chair or sofa is a candidate, and you have some awesome skills to get you through the process. Now let’s talk about the sewing machines. Not knowing every sewing machine out there, when asked, “Can I sew a slipcover with my sewing machine?” I can’t answer that question for you. I suggest you buy a quarter yard of the fabric you wish to use for your slipcover project and try sewing through 6 or more layers at once. If you are successful, then yes, it will work! I know that sounds like an awful lot of fabric, but yes, we sew through many layers when making slipcovers. Just think about slipcovers with a skirt for a minute. You are attaching the skirt to the body of the cover with a welt cord between the two. There are 5 layers right there: the body, 2 layers for the cording, then the skirt front and back. But wait… when you come to the side with the zipper, one edge is double, and the other has a row of cording, so there are at least one, and probably two, more layers of fabric. So now you see that 6 to 8 layers are what your sewing machine needs to handle.
What type of fabric should I use for my slipcovers?
While we are still on the topic of fabric, which type should you use? My personal preference is a 10oz—brushed cotton twill. I love the soft feel and the way it drapes on a piece of furniture while still holding its shape. Many of my clients have washed their slipcovers (not putting them in the dryer), and they still look like new. They wear well and hold well to everyday use. Fabrics I would not suggest are heavy upholstery fabrics, lightweight drapery fabrics, and fabrics intended for garments or quilting. You want to make sure you are using fabric intended for home decorating; these fabrics will be 54 – 60 inches wide. Big Duck Canvas offers a 10 oz pre-shrunk canvas at a very reasonable price.
“To ensure you get the custom fitted look you want and not that store bought version that almost fits, actually really doesn’t fit at all, I have created a 5 hour video tutorial to get you all the way through your project. From measuring to determine how much fabric to buy, cutting your fabric, pinning it to your piece, sewing the slipcover together, attaching a skirt and even sewing your perfect fitting cushion cover.”
 To ensure you get the custom-fitted look you want (not that store-bought version that almost fits…well, let’s be honest, it actually doesn’t fit at all)
Wow… you’ve got all the bases covered, so let’s get started on your slipcover. Ok, you don’t know where to start, I can help with that. To ensure you get the custom-fitted look you want and not that store-bought version that almost fits, actually really doesn’t fit at all, I have created a 5-hour video tutorial to get you all the way through your project. It Includes:
- Measuring to determine how much fabric to buy
- Cutting your fabric
- Pinning it to your piece
- Sewing the slipcovers together
- Attaching a skirt
- Sewing your perfect-fitting cushion cover
- Oh, and you want a print fabric? No problem!! We also discuss matching your fabric pattern for that truly CUSTOM look.
With this tutorial, you can look over my shoulder and clearly see every step as I work and explain the process to you. You can even start and stop or rewind if you need to see that part again. One other great feature of our video tutorials is that they are broken down into parts or chapters, so you can easily go back to any section that you need to review again later as you start your slipcover project.
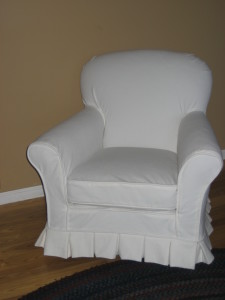
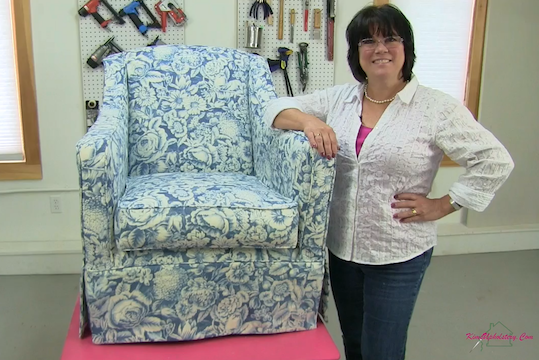 Slipcovering a Straight Arm Club Chair Video
Wait, this is not the chair you have? Not a problem, as the skills I teach will work on your chair too! So sit back, watch the video, and then let’s get started together. And please share your finished slipcover pictures with me, as I would love to see your finished project!
Happy pinning and sewing,
Kim
P.S. – While you are here, be sure to check out our online membership and bundle videos for sale.