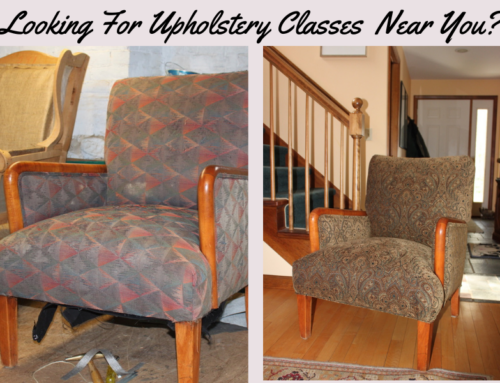
A new kitchen means I get to change my decor!
We recently moved which meant getting rid of some old things to make room for new. In our new kitchen, there is a counter seating area which meant I needed a couple of counter stools of course. For months I looked on the Facebook marketplace for stools that I could reupholster with no luck.
So where was I going to find just the right stools for my kitchen?
Many of the store-bought stools looked ok but when I read what they were made of I knew they weren’t going to last. So being a true Die Hard DIYer I turned to my furniture frame catalog from Frank Chervan and wah-lah! There it was, the perfect frame for my new kitchen seating area. Upholstering them myself gave me a chance to get exactly what I wanted.
Other articles you might enjoy:
- If you are wanting to reupholster your sofa, take a look at the post Upholstery DIY: Can I use the skills you teach to reupholster a couch?
- Another post you might enjoy is How much will it cost to reupholster my chair or couch as a DIYer?


Be sure to plan for leg room for sitting on your stools.
If you have ever looked for stools you know they come in bar and counter heights so be sure to measure your seating area before you purchase anything. In my situation I needed the counter stool heights which had a deck height of 22”. My under-counter height was 34” so adding 2” of high-density firm foam and dacron to the seat of my stools I ended up at about 24” finished height. This left me with 10” of space for legroom. The bar stool height would have finished at 31.5” which left no leg room whatsoever.


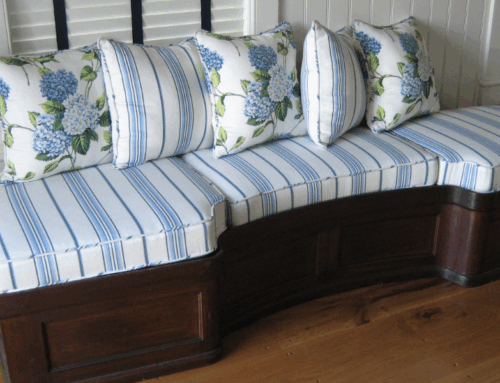
So many fabrics, what shall I choose?
(My daughter thinks my fabric choice was a bit funky 😂)
I am absolutely thrilled with my fabric choice and believe me I changed my mind several times, you can relate, right? Why is it when we are choosing for ourselves it is such a painstaking process? The floral print I chose is a Clark & Clark print called Lotus Summer which I purchased from Kravets.
The buffalo check fabric was purchased from Greenhouse Fabrics and is also an outdoor fabric that makes for better durability and cleaning up little spills. With 6 grandchildren and the fact that we truly LIVE Life in our house this was a plus for sure. (hopefully, it can withstand spilled wine which is bound to happen sooner or later. 😉


Did I mention that I used General Finishes Milk paint in black for this project? I love their product.
How did I upholster these kitchen stools you ask? Well of course as I was upholstering we created a video of the process just for you! This 5 part tutorial, available in our membership will show you step by step what you need to do and just how and why I made the choices I did.
Supplies:
- High Density 2.4 firm foam large enough for your project
- 1 ounce bonded Dacron 1 yard by 54″
- 5/32″ Fiber flex welt cord
- 3/8″ staples
- Foam spray adhesive
- Synthetic cotton
- Black accord dust cover hot glue sticks
Tools:
- Longnose pneumatic staple gun and compressor
- Osborne 120 1/2 staple puller
- Osborne Bent Awl
- Wire cutters
- Sharp scissors
- Small snipping scissors
- Upholsterers Regulator
- High temp hot glue gun
- Foam Saw or Electric Carving Knife
- Straight edge and tape measure
I hope you will share your project with me in our membership community or in our Kim’s Upholstery DIY Hangout group on Facebook if you aren’t quite ready to join our membership gang.