Adding a little DIY to my purchased lampshade!
I have covered several lampshades for myself over the years (see some images below), but for this project, I purchased a pair of lampshades from Lamps Plus (not an affiliate link just liked their product) and added my own DIY embellishment. This was a quick and simple DIY lampshade project and the quality of the shades I purchased are GREAT!


Making the lampshades reflect my style!
My inspiration for the lampshades was a photo from Crafty Robin Restyles I saw on Facebook. At about the same time I saw Robins post, one of our members had shared this technique of stenciling fabric for an upholstery project that she was doing. The two posts were exactly what I needed to get the look I was wanting. I purchased the shades from Lamp Plus and the supplies that Leah had told me about. Now I was on my way to creating two beautiful lampshades for our new home. (Affiliate links –The Speedball Ink, studioR12.com Stencil, and Stencil Ease Adhesive spray were all purchased from Amazon.)
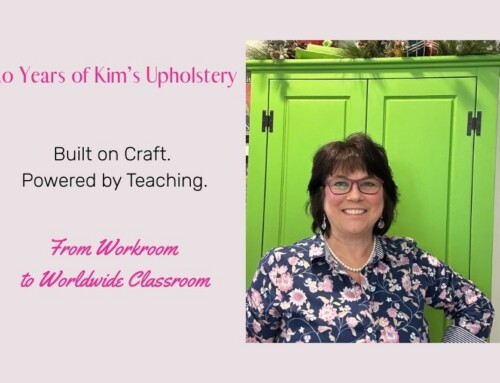
The stencil adhesive made it super easy to stencil my chosen design. One word of caution is don’t overspray the back of your stencil as it can leave a glue spot. Luckily the spot it left dried clear but you never know how it is going to react with your chosen fabric. I didn’t measure or the placement but just eyeballed what looked good to my eye. If I were working in a larger area I would definitely plan it out to get my placement just right. For these shades, my stencil just fit between the top and bottom banding so placing the stencil to ensure the center word was straight was my only concern.


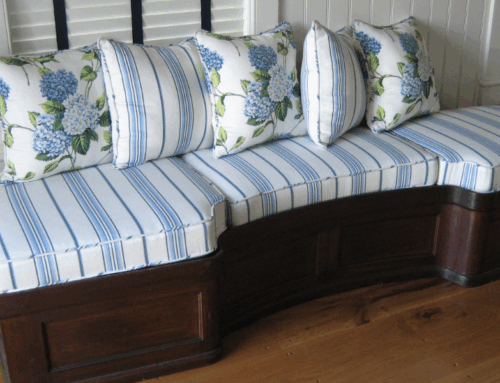
Applying the screen print ink to my stencil
I had never used a screen printing ink before and was pleasantly surprised to find out how easy it was to work with. I chose a foam brush to apply the ink and was careful to pounce the brush on a few layers of paper towel before painting over the stencil. This ensured I didn’t have too much ink on my brush, kinda like a dry brush technique. It worked out great! As soon as I was done applying the ink and had the lettering covered to my satisfaction I simply peeled the stencil off and moved on to the second shade. I tested the process out on a few dish towels prior to applying the ink on my shades just to be sure I wasn’t going to have any surprises. FYI, Speedball has many colors available and I do have a few holiday projects that I think I will order some other colors for.

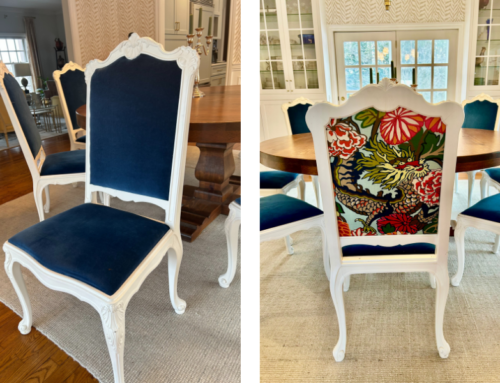
DIY Lampshade Fun
A few inexpensive supplies, a lampshade of your choosing, and in less than an hour’s work I had created a new look for my shades! I can see so many possibilities for using these supplies and stencil techniques, custom napkins, pillows, bedding, and of course upholstery!
I would love to see what project you try. Please share pictures with me on Facebook. Thanks for reading my blog and don’t forget to share it on social media with your friends.

Are you wanting to learn another fun DIY skill? Learn how to upholster furniture with our online membership classes. You won’t be disappointed but you definitely will have a new addiction.