“How do I measure for my cushion cover and foam?”
I often get asked, “How do I measure for my cushion cover?” Today, I decided to post the answer in a blog post. Once you have the piece of furniture you want to make a cushion for, it’s easy to determine the size of your finished cushion. Using measurements right from the chair, we can decide our yardage and the cut piece sizes you will need. So let’s get started.
Measuring your chair to make a cushion
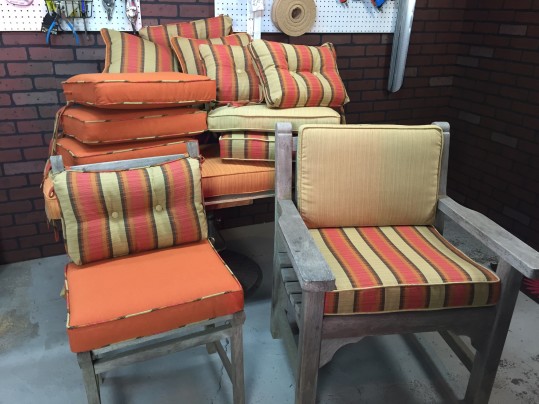
In this example I have a small chair that is used for eating in an outdoor setting. Some of things you need to consider are who will use the piece, and how it will be used. In our case this is a chair that you will sit up straight in and not be lounging in. A tall person for example would want a chair that sat much higher than a short person might be comfortable in. An average seat height with your finished cushion is 17″ to 19″. Keeping this in mind can help you decide how thick you want your cushion to sit. The one I am using here will be a 3″ thick cushion.
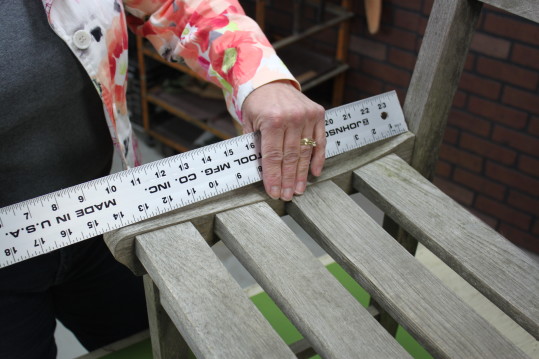
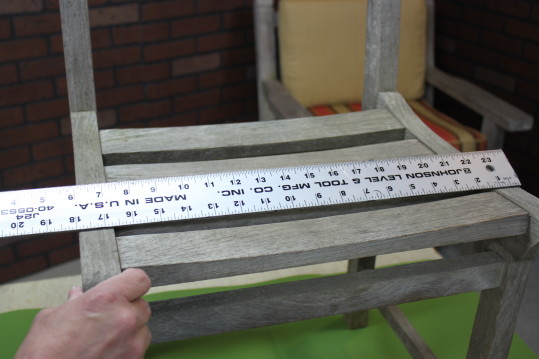
Now that you’ve got the height you want, let’s measure to figure out our fabric needs. Using the actual chair, you can measure across the width of your seat; ours is 18″W. If your chair is tapered so that the back is narrower, you need to measure that as well. In our case, it is a consistent 18″W across the front as well as the back. Next, you want to measure the depth of the chair from front to back, ours is 14.5″ Deep. These measurements will be our finished cushion size, 3″H X 18″W X 14.5″D. Now we can determine our cuts for your cushion cover.
 Cutting out my fabric sizes for my cushions
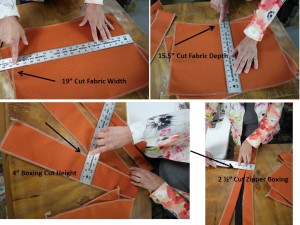
Using your measurements from above, you can now determine how much fabric you will need to buy. For one cushion cover, I will need 25″ of 54″ W fabric for the main part of my cushion and a minimum of 1 yard for cording. I use a 1/2″ seam allowance when sewing cushions, so I need to add that to my cut measurement sizes (example 1/2″ + 18″W + 1/2″= 19″W cut size) . In this example I will need to cut the following pieces:
- Boxing strip 4″H X 54″W (W+(Dx2))
- Top and bottom (2 pieces) 19″W X 15.5″D
- Zipper boxing 2 1/2″H (half of the cut boxing height plus 1/2″ seam allowance to sew zipper on) X 25″W (19″W + 6″ to allow 3″ to come around both sides of the cushion)
- Cording (optional) 170″ enough to go around the top and bottom of the cushion, plus about 10″ to make joints.
Measuring Foam for Cushions
Well, we’ve figured out the fabric for our cushion cover now, what about the foam? There are several ways to view the foam sizes. Some people like to make the boxing a 1/2″ shorter, ie, 4″ foam for a 3 1/2″ finished boxing. This gives a very tight fit and looks nice. You can also have your foam the same thickness as your finished boxing and wrap it with Dacron to achieve a more rounded edge look, which is also lovely. Others cut their foam the same as your top and bottom fabric cuts, which is also a nice look. Be cautious with this last option if you have a situation where the frame the cushion is going into is solid, such as a window seat with sides, as it may not sit quite right.
Now, you can take any piece you might have and determine what size your cushion cover needs to be. If you’re interested in a full tutorial on making cushions, please check out our online upholstery classes membership site for video tutorials on fabricating different style cushions.
Thanks for reading my blog, and please SHARE it with your social media friends.
This free PDF download will take the guesswork out of choosing foam and filling
for your next cushion project. Just fill out the form,
and it will be sent to your inbox. Easy and fast!


 Cutting out my fabric sizes for my cushions