Kim says “Everybody needs a Bill!”
Having your air compressor develops a problem in the middle of a project is frustrating, to say the least. Wait for it… breaking something on your air compressor while you’re trying to fix that problem, well it is totally annoying (A few expletives would be fitting here but I’ll keep it clean). Did I mention that cleaning the air compressor is exactly what brought on the problems?
A few days ago as I was using a blower attachment on my air compressor to clean the dust from a freshly stripped-down upholstery project. As I was blowing away the dust I noticed moisture spurting out of the nozzle. “OH BILL, I need your help to fix my air compressor problem”. I couldn’t have dirty wet air running through my staple gun, spitting and staining my upholstery fabrics now could I?
A simple 5-minute air compressor DIY repair…. yeah right!
Bill explained that water condensation is a natural occurrence and a byproduct of compressing air. He reminded me that it had been very humid for the last few months and that he had not drained the compressor tank in quite a while. Draining the tank is a simple task, well most of the time it is. You know how that goes, don’t you?
Regular maintenance can save you time
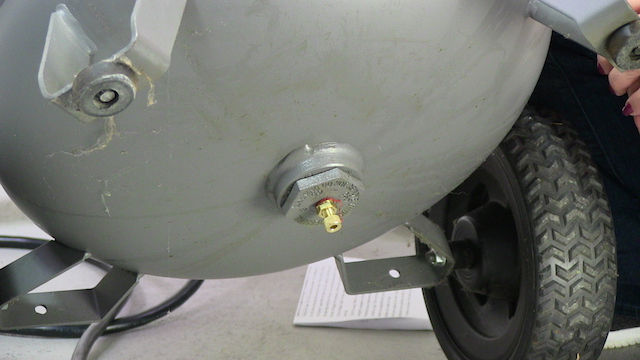
To drain the tank Bill unplugs the power cord, disconnects the hoses and rolls the compressor outdoors. At the bottom of the air compressor tank is a gadget called a drain valve which has a thumb screw for releasing the air. Bill says that I should learn how to do this part and that we should be doing this maintenance regularly. I go ahead and loosen the thumbscrew to release the air and water from the tank. The compressed air in the tank helps to blow out the water. Yuk! I see more than just water coming from the tank. What came out was a combination of rust, dirt, and whatever else was inside the tank. What a mess it was leaving on the ground. I guess that’s the reason we do this outdoors.

Oh NOOOO!
Soon the air and dirty water stopped running out of the tank. I turn the thumbscrew back in and close the drain valve. Bill plugs the compressor in to refill the tank and checks the valve for any air leakage. Crap!! The valve is leaking and no matter what I do it won’t stop. Time for a new valve. What an inconvenience!
Now that was lucky!
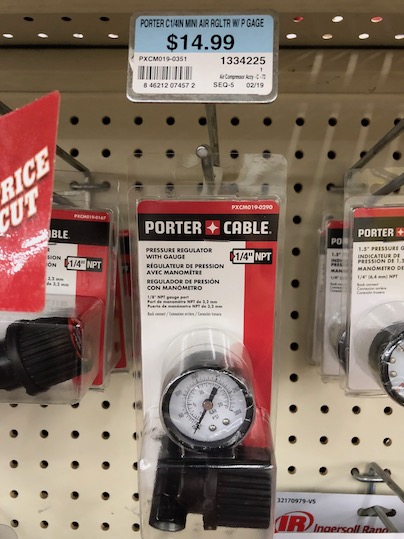
We head to the local store where we bought the air compressor, thinking the whole time that the chances of the store having a replacement drain valve in stock is a long shot. Well, luck was on our side. They not only had the same drain valve we needed but a variety of other valves that would have worked just as well. Phew! Back to the upholstery studio to make our simple repair.
In the course of replacing the valve, we laid the air compressor on it’s back leaning onto our short upholstery workhorse.
I use a wrench to loosen the old drain valve, remove it, and screw in the new one. Job well done! We stand the air compressor upright and plug the power cord in. Great, no more leak at the drain valve. We move the air compressor back inside, hook up the air hoses and begin to work on our upholstered chair project as the tank continues to fill.
Our air compressor is very noisy so we keep it in a separate room and run hoses into the room where we work on all upholstery projects. The room we work in is also the main room where we shoot most of our upholstery class videos and produce our Kim’s Upholstery Live shows. Some of you may have seen them on Facebook and Youtube.
I hear air leaking again, grrr
As we are working we realize that the air compressor has been running for some time now. What’s up with that? I walk into the room where the air compressor is running and shut it off. I hear air leaking again, grrr. Remember I said that we laid the compressor on a workhorse to change the valve. Well I didn’t realize the horse was hitting the air control valve and now that has a crack! (UGH) Well it’s back to the store for a new air valve. Fingers crossed that they have one in the store. Woohoo, we were lucky twice in one day, as they had the valve we needed.
Be sure to check out The Upholstery Life page for other videos realted to #UpholsteryLife
With the new valve in place, we check the operation of the compressor again. (fingers and toes croseed) Success! Everything is working fine. My opinion of the store where I purchased the compressor has gone way up and my day was not nearly as bad as I thought it would be.
Have you had a similar experience?
Please let us know what repairs you’ve had to make or issues you’ve run into in the comments section below this blog post.
Did you know we have lots of tips, tutorials and resources in our membership? Join our upholstery family and lets chat somemore!


Leave A Comment