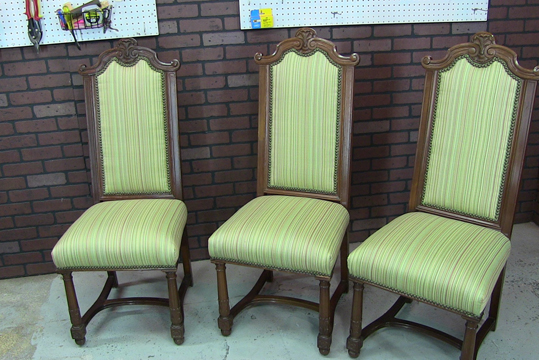
In this Dining Room Chair upholstery video tutorial you will learn the steps we used in upholstering this chair. The video begins with your seat support system including sagless and springs. Once we have completed the springing up portion of the seat I will then go into padding the seats before applying the finished fabric. With the seat upholstery completed we will go on to add a support system, again using sagless, to the inside back. The padding and fabric will be applied to the inside and outside back before we move on to the final details. To complete this project we will be applying decorative gimp followed by antique brass upholstery nails.
This video has a running time of 1 hour and 50 minutes
- Part 1 Tear Down
- Part 2 Springing Up
- Part 3 Padding The Seat
- Part 4 Seat Fabric
- Part 5 Inside Back Sagless
- Part 6 Padding the Inside Back
- Part 7 Inside Back Fabric
- Part 8 Outside Back Padding and Fabric
- Part 9 Gimp and Decorative Nails
Supplies:
- Synthetic Sagless (woven polypropylene)
- Ruby Italian Jute
- Coil Springs
- 1 ¼” Edge Roll
- Burlap
- Synthetic Cotton (Natural Cotton is fine)
- 1 oz. Bonded Dacron
- ⅜” and 9/16” Staples
- Number 12 upholstery tacks
- Muslin
- Decorative Gimp
- ½” Decorative Antique Finish Upholstery Tacks
- Dust Cover
- 2.5 yards Face Fabric
Tools:
- Pneumatic Long Nose Staple Gun
- Osborne 120 ½ Staple Puller
- Wire Cutters
- Scissors
- Klinch-It Tool
- Sagless Stretcher Tool
- Hot Glue Gun
- Magnetic Upholstery Tack Hammer


