


How to Reupholster a Martha Washington Arm Chair
$19.99
Description
What You Get
Watch a Preview
Class Overview
This is a video for the beginner upholsterer. The techniques you will learn in this video can be applied to many types of wood armchairs and can be used to learn to reupholster a variety of other chairs.
In this video, Bill will take you through the tear-down process. You will see the tools Bill uses to tear down this chair. We will then go through the steps for re-attaching and tying the coil springs using an eight-way tie.
Once Bill has the springs covered with Burlap and attaches the edge roll, Kim will begin padding the chair using synthetic upholstery cotton and Dacron. We will begin upholstering the seat, followed by the inside back and outside back.
You will learn about the cuts used in the reupholstery of this Martha Washington Arm Chair. This video is broken down into parts to enable you to rewatch just what you need.
In this video you will learn about:
- Use upholstery tools and upholstery supplies
- Teardown
- Spring Up
- Burlap and Edge Roll
- Padding the Seat
- Adding Fabric to the Seat
- Adding Webbing and Burlap to the Inside Back
- Padding the Inside Back
- Adding Fabric to the Inside Back
- Applying Fabric to the Outside Back
- Hand Sewing-Cording-Dust Cover
Run Time: Approximately 3.5 hours
For more helpful tips and insider techniques check out our Freebies and Upholstery Life pages.
Class Lesson Breakdown
- Part 1 Teardown
- Part 2 Spring Up
- Part 3 Burlap and Edge Roll
- Part 4 Padding the Seat
- Part 5 Adding Fabric to the Seat
- Part 6 Adding Webbing and Burlap to the Inside Back
- Part 7 Padding the Inside Back
- Part 8 Adding Fabric to the Inside Back
- Part 9 Applying Fabric to the Outside Back
- Part 10 Hand Sewing-Cording-Dust Cover
Materials
Supplies:
- Synthetic Sagless
- Synthetic Upholstery Cotton
- 1 oz. Bonded Upholstery Dacron
- 9 gauge Coil Springs
- Ludlow #6 Tuff Twine, 100% Polyester Tying Twine
- Burlap
- 1 ¼” Edge Roll
- ⅜” Staples
- 9/16” Staples
- 6/32” Fiber Flex Welt Cord
- Muslin
- 4 yard Upholstery Weight Fabric purchased from Farmhouse Wares
Tools:
- Tape Measure
- Straight edge
- Scissors
- Osborne 120 ½ staple puller
- Wire Cutters
- Osborne Square Point Knife
- Sagless Stretcher
- Pneumatic Long Nose Staple gun
- Air Compressor
- Juki DNU 1541s Industrial Sewing Machine
- Double Welt foot
Taught By
Kimberley Chagnon
 Kimberley ChagnonWith over 20 years of experience, Kimberley Chagnon has become a trusted name in both upholstery and instruction. In 1996, she started her own business, Kim’s Upholstery, which continues to thrive and give clients the custom upholstery they truly want. When she’s not busy in the workroom, Kim is busy teaching. For the past six years, she’s led classes for the Window Coverings Association of America group as well as popular trade shows, workshops and conferences.
Skill Level
Beginner
How it Works
Once you purchase find your class in your classes list.
Instant and unlimited access.
Watch on any device anytime.
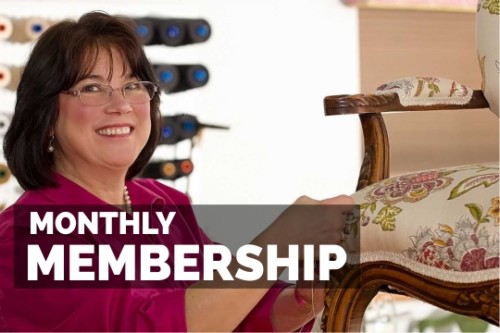
Monthly Membership
This class is also available as part of the monthly membership. For only $49 per month you receive unlimited access to all of our classes!
“Dear Kim,
I just finished my first project and wanted you to see the results. I used your tutorial Queen Anne chair and it was a huge help. Thank you.”
– Amy
Bonnie Dejeet –
This video is an amazing tutorial, all of Kim’s videos are extremely detailed!! I highly recommend !!
Patti –
Very informative and easy to follow. Couldn’t have finished my project without Kim’s great instruction. Only problem – now I am addicted to this reupholstering thing!
Lorry Gronback –
I’ve been learning this craft with the help of Kims videos for about 2 years. I was recently doing a chair for my daughter-in-law and went back to this video to see how to do something. All of the videos are a great source for learning, but when you are stuck on something and need an answer they are priceless!
Denise Bryan –
Most of the upholstery skill I have I’ve learned from Kim and her videos. This is a basic chair video, but this is the starting place for everything else. I’ve upholstered a recliner, two club chairs, two sofas, three wing chairs, a wicker rocker, an ottoman, a love seat, and a bergere chair. All that I learned from Kim. Highly recommend!
Denise B
MI
Rhonda Shanahan –
WOW! What a great video. Kim provided everything I needed to do my chair from start to finish. She gives clear instructions and step by step directions. I am so happy with how my chair turned out.