

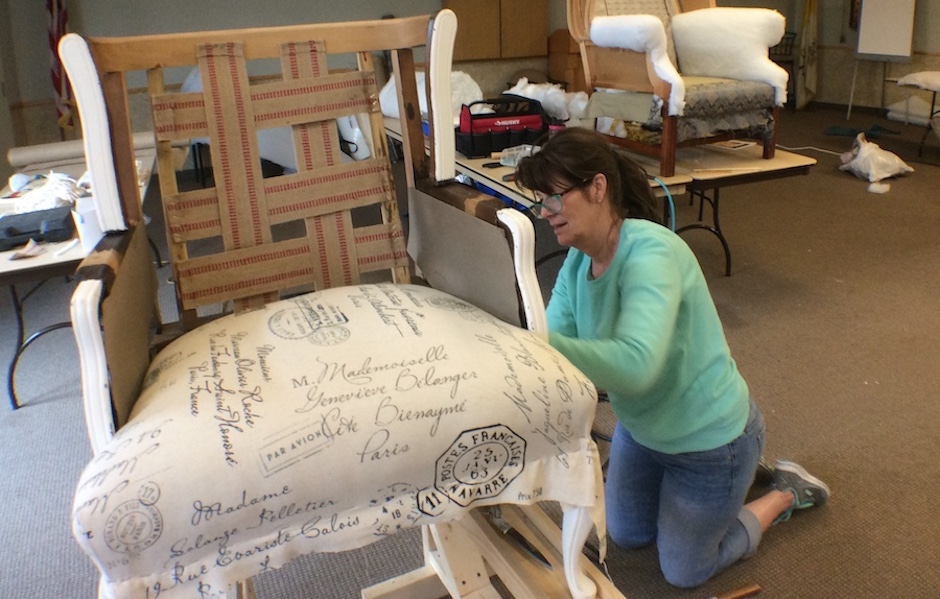
Join us in Plymouth, Michigan, for a fun-filled 3-day Small Chair Upholstery Workshop on June 4-6, 2027.
Hosted by Denise Bryan
Attend all 3 days for only $795
This hands-on chair upholstery workshop is packed full of learning opportunities. Learn how to reupholster a chair while working on your own project. These workshops are specifically designed to help beginners and more advanced upholsterers learn how to reupholster a bare chair frame and hone their skills.
Whether you’re a DIYer, a beginner, or a more advanced upholsterer, you’ll take away a lot of new knowledge and confidence. We limit class size to 6 students, so you’ll get one-on-one instruction. By the end of the workshop, you will have a finished piece to be proud of.
Expect to learn new techniques, acquire new skills, and have fun!
UPHOLSTERY WORKSHOP FOR ALL SKILL LEVELS
INSTRUCTION FROM AN INDUSTRY EXPERT
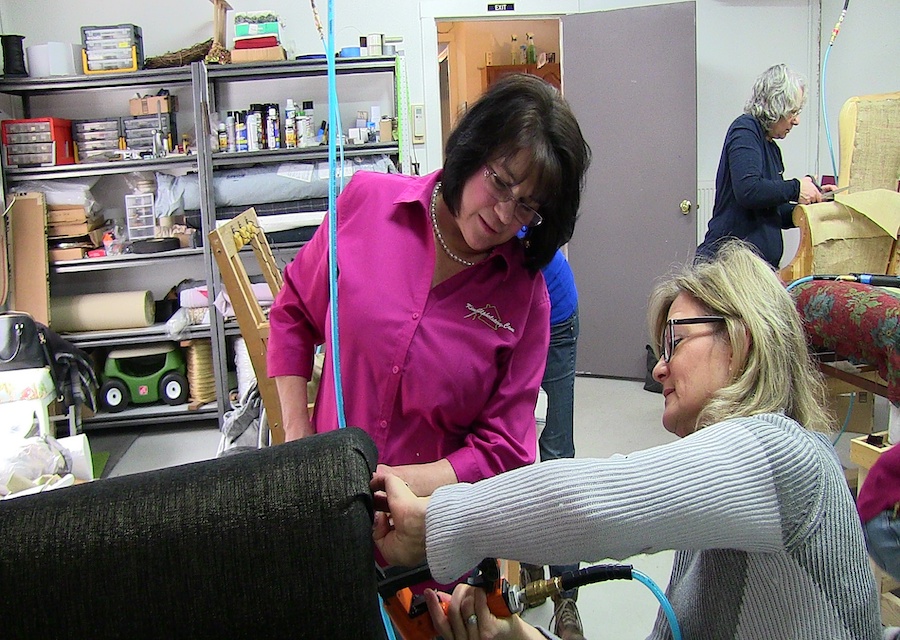
With 30+ years of experience, Kimberley Chagnon has become a trusted name and a highly sought-after instructor in upholstery education.
In 1996, she started her own business, Kim’s Upholstery. Early in 2018, in response to growing requests for upholstery education, Kim’s Upholstery shifted its focus exclusively to educating DIYers and professional furniture upholsterers.
When she’s not creating in her workroom, Kim teaches upholstery online and through in-person, hands-on workshops. Over the past several years, she’s led classes for professional associations as well as popular trade shows and conferences. She’s also been featured several times on local Television networks, highlighted in regional publications, and asked to speak to professional groups.
WORKSHOP DETAILS
WORKSHOP OVERVIEW
- Limited to 6 students
- Workshop duration is 3 days
- By the end of 3 days your project will be mostly completed
- Price to attend is $795 (50% deposit due upon registration to hold your spot); balance will be auto-charged 30 days out
- Your specific chair must be pre-approved by Kim
- Tear down of chair must be completed prior to the start of the workshop
- Students will come prepared with their own fabric for their project
- Sessions will run from 8:00 am to 4 or 5:00 pm – with a 1-hour lunch break
- Day 3 usually ends at 3:00 pm
- Each student is responsible for coming prepared with all necessary tools and supplies for your project (if you have questions, email info@kimsupholstery.com)
- Please choose a project that is for you and not a client
- Students are responsible for coming with the correct amount of fabric for their project
- Cushions are not part of this upholstery workshop
Before this small chair upholstery workshop, students must submit a picture of the project they would like to work on for approval. Choosing the right chair to reupholster will help you complete the project within the allotted time frame. Please email pictures to me, Kim Chagnon, at kimberley@kimsupholstery.com.
As you tear down your chair, take notes of the supplies you will need to bring to the workshop. I encourage you to refer to this printable supplies list as well. If you have any questions about supplies needed, please email Kim.
Fabric yardage can be determined by watching the “Measuring for Fabric Yardage” video, which is available for free.
By attending this workshop, you agree to allow Kim’s Upholstery to take photos or videos of you for marketing and promotional purposes.
WORKSHOP PRICING
- 6 students per workshop
- The cost is $795 (50% deposit payment due upon registration to hold your spot)
- The final Payment will be auto-charged 30 days later.
- If you cancel more than 60 days before the workshop date, you will receive a 75% refund.
- Cancellation after 60 days prior to the workshop will be non-refundable
CONTACT INFORMATION
HOSTESS
Denise Bryan
48907 W. Hillcrest Ct.
Plymouth, Michigan 48170
Email: ndbryan1229@gmail.com
INSTRUCTOR
Kimberley Chagnon
Email: kimberley@kimsupholstery.com
LODGING SUGGESTIONS
SCHEDULE
DAY ONE
Arrival – Students arrive between 8:00 am and 8:30 am.
Introductions – Once everyone’s projects are unloaded and set up, we take a few minutes to visit and get to know one another.
Getting Started – Then it’s time to start upholstering.
What to Expect on Day One – By the end of day one, spring systems are in place and the deck or seat of your chair is completed. Depending on the style of your chair the inside arms may also be underway.
Lunch Time – At 12:30 pm we take a 1-hour break
Quitting Time – Expect to end the day between 4:30 pm and 5:00 pm
DAY TWO
Start at 8:30am
What to Expect on Day Two – Today is the day we get the insides of our projects completed and some students may even start on the outside arms.
This is the “dig in and get-it-done day” in order to reach the finish line on the final day.
During day two the bonds between the students have formed and there is usually lots of lively discussion and laughter.
By the end of day two everyone is usually tired, but more importantly, feeling very proud of all they have accomplished.
Lunch Time – At 12:30 pm we take a 1-hour break
Quitting Time – Expect to end the day between 4:30 pm and 5:00 pm
DAY THREE
Start at 8:30am
What to Expect on Day Three – It’s the last day and often times we will be finished mid-afternoon…but that is not always the case.
On day 3 we finish up the outsides and attend to those little details that some pieces have, such as attaching double welt, adding decorative tacks, or hand stitching.
We may also address the unexpected details that a student might have decided to add to their piece.
Today you leave with a piece you can be proud of!
Lunch Time – At 12:30 pm, we take a 1-hour break
Quitting Time – Expect to end the day at 3:30 pm
TOOLS & SUPPLIES YOU WILL NEED FOR THIS WORKSHOP
- A good long-nose pneumatic staple gun (watch video), hose, and quiet compressor with fittings (watch Video)
- Staple guns with a safety on the nose of the gun do not work for upholstery.
- Meite and Sailrite both make good staple guns for upholstery
- Osborne 120 ½ Staple Puller
- Wire/Side cutters
- Magnetic tack hammer
- Wooden mallet
- Regulator – 12” non-handle type
- Webbing stretcher – Goose Neck
- A good pair of scissors (SHARP) 10” to 12” and a small pair of scissors
- Tape measure
- Soft cloth tape measure
- Curved needles size 6” and 3”
- 6” straight needle
- Tin Snips
- School Chalk
- Marking Pencil
- Sharpie
- Stool to sit on while you work (optional)
- Workhorses – Pair of same height download PDF of cut materials list
- If you make your workhorses with removable bottom feet, they will travel better and take up less space.
DOWNLOAD THE TOOL AND SUPPLY LIST HERE
Here is a link to my amazon shop for tools and supplies. KIM’S AMAZON SHOP
Your list may vary depending on your chosen piece
- 1 roll of upholstery Cotton – NOT Quilting cotton or batting
- 1 ounce bonded Dacron 54” W same yardage as your fabric -NOT Craft or quilting
- Foam depending on your piece
- Staples – Leg length 9/16”, ⅜” and ¼”( if you have arm panels)
- Staple crown size needs to fit your staple gun
- ½” Cardboard tack strip
- 69 bonded nylon threads to match the fabric
- Button twine
- Edge roll’s ½” and 1 ¼” are what I use most often
- Burlap 5 yards
- Jute webbing – red stripe
- 5/32” Fiberflex Welt Cord (make your cording prior to workshop)
- Spring tying twine (ruby Italian jute)
- Upholstery tacks for spring tying (number 12 or 14)
- Upholstery Fabric (buy a couple of yards extra) – I suggest NO large repeats that require pattern matching or expensive fabrics for your first project as it takes away from you learning the basic skills.
- Cambric Dust Cover
- Muslin same yardage as your fabric
- Curve Ease
- Metal Tack Strips (4)
DOWNLOAD THE TOOL AND SUPPLY LIST HERE
What people are saying about our workshops…

“What a fun weekend. Five very different chairs, all complete and looking incredible. I enjoyed Ashfield so much. I stayed at a wonderful Air BnB owned by two artist and their dog Charlie. Each day we worked non stop, in this spacious and well lit barn, provided by our host Amy, along with incredible comfort food. Kim guided us with every detail, introduced us to new tools and tricks to give us confidence and pride in the results. Big thank you to Bill and Kim for setting this up. We are fortunate to know you.”
“The three day upholstery workshop I took with Kim from Kim’s Upholstery was fabulous! I found Kim to be energetic and knowledgeable. The class was composed of five women with five different chairs. This did not phase Kim in the least. She was able to transition from assisting one attendee to another with ease and made it seem effortless. I am very happy with my finished chair and feel confident in attempting to upholster another chair after taking this class. I know she is an email or phone call away if I have any questions. I highly recommend this class to anyone interested in upholstering, beginner or intermediate.”

“I attended a three day workshop in Northborough, MA last year with 4 other ladies and we had a blast learning and enjoying each other’s company whilst working hard. We had Kim with us all the way, and each of us having a different chair, we learned different skills watching them do their chairs. Kim helped us from the bare wood upwards until the finished product and it was a pleasure. She explained every technique we did and the correct order of upholstering our piece of furniture. Now, if we have any questions we know that she is only an email or phone call away from asking her questions. I am a hands on learner so this was very helpful having Kim by my side all the way.”